
Homemade furikake no. 6: Gomashio, sesame salt
[Updated: Originally published back in January 2008, this is one of the most popular articles on Just Bento. I've updated it with a much more hands-free oven method for making gomashio.]
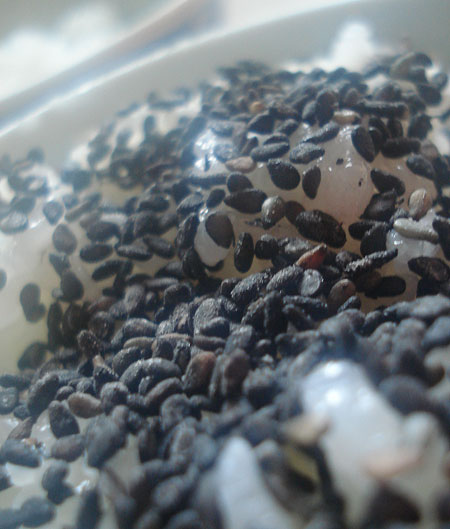
OK I admit, I don't have bacon furikake that often. On the other hand I eat gomashio (ごま塩), sesame seed salt, all the time. You could say that the simple combination of toasted sesame seeds and salt is the quintessential furikake.
Gomashio is also very nutritious. Macrobiotics advocates say that a meal of brown rice sprinkled with gomashio is fairly nutritionally complete. I think I'd want a bit more than that in my bento box, but there's definitely a simplicity and purity to that combination. And gomashio is essential for _osekihan_, Japanese azuki beans and rice.
There are two problems with commercial gomashio for me. First, it's pretty expensive here. Second, sometimes the sesame seeds have gone a bit rancid. When I discovered that I can get raw untoasted sesame seeds pretty cheaply at my local Chinese grocery store, my search for a simple gomashio recipe began.
I saw basically three methods. One was just to mix some salt with the sesame seeds. This is the easiest, but the salt isn't that well distributed. The second method was to grind the salt very very finely with a _suribachi_ and surikogi or mortar and pestle. The powdered salt would then coat the sesame seeds.
But I went with the third method, which sounded the most logical. With this method, each sesame seed gets coated completely with a little salt mantle. And of course, you can vary the ratio of sesame to salt to whatever you prefer. I think this is the best way to make gomashio.
Homemade gomashio, sesame salt - stovetop method
The sesame to salt ratio of commercial gomashio is usually 8:1 in weight. This is pretty salty. I like to drop the ratio down to 10:1, which is easy to remember. It also allows me to sprinkle the gomashio liberally if I want to. Experiment with different ratios to see what you prefer.
I would recommend using a pretty accurate kitchen scale. (If you live in the U.S. and are in the market for a new one, try to get one that can switch from metric to imperial measurements. That way you can easily tackle European and Asian recipes!)
- 100 g / 3.5 oz. raw sesame seeds (You can tell if the seeds haven't been toasted yet if they are flat. Toasted sesame seeds puff up and become round.)
- 10g / .35 oz salt of your choice (I like to use a grey sea salt from Brittany, but any salt will do)
- About 1/2 cup (100ml or so) of water
Equipment needed: a large non-stick frying pan
Dissolve the salt in the water, until the grains are completely gone.
Spread the sesame seeds out in the frying pan. Over medium-low heat, stir around until the seeds start to 'pop'. Take off the heat and keep stirring until the popping stops. (If you can only get a hold of toasted sesame seeds (in Japan this is pretty common; it's called irigoma 炒りごま) you can skip this toasting step.)
Return the pan to the heat, and add the salt water. Stir around to distribute evenly. The seeds will clump up. Keep stirring over a medium-low heat - scrape off any salt that sticks to the pan. Keep stirring and scraping, until the water evaporates. The seeds will coated with fine salt crystals so that they look greyish in color, and will no longer be clumpy.
Take the pan off the heat and let the seeds cool in the pan - they'll dry off better in the warm pan. Once they have cooled down completely and are totally dry, they can packed in an air-tight container. They will keep for about a month in a cool, dry place. (I just keep mine in the pantry, but you could keep it in your refrigerator too.)
Homemade gomashio, sesame salt - oven method
This method takes longer, but is much less hands-on than the stovetop method. You can make a bigger quantity of sesame salt at one time this way too, so I'll give a double-amount here.
- 200 g / 7 oz. raw sesame seeds
- 20g / .7 oz salt of your choice (an inexpensive yet still 'pure' salt option is kosher salt)
- About 3/4 cup (150ml) warm water
Preheat the oven to 150°C / 300°F.
Put the sesame seeds on a baking sheet with a lip so that the seeds don't roll off all over the place. Spread them out as evenly as possible. Put int the heated oven for 5 minutes.
In the meantime, dissolve the salt in the water, until the grains are completely gone.
Take the baking sheet out of the oven - it should be hot and the seeds may have started popping. Pour the water over the seeds (the water will sizzle a bit) and mix thoroughly with a spatula. Try to even out the clumps as much as possible. Return to the oven, lower the heat to 100°C/210°F, and set the oven timer for 1 hour.
At the end of the hour, stir the seeds around - they will probably still be a little moist. Turn the oven off, return the baking sheet to the oven, and leave there for several hours or overnight.
At the end, the seeds should be completely dry, and greyish in color from the salt. If it is still moist at all, stir it up, turn the oven back on to 100°C/210°F for another 15 minutes or so, then turn the oven off and leave the sheet in again until the oven has cooled down.
You may have some clumps, and the seeds and salt at the bottom may be a bit stuck. Scrape this off with a spatula, stir well
and break up the clumps. Store the completely cooked sesame salt in an airtight container in a cool, dry place.
Notes
You may see some recipes saying that you should grind the sesame seeds. I don't do this because grinding releases the oils, making them very susceptible to getting rancid fast. (And no, gomashio as it's used in Japan is not ground up necessarily.) If I want them ground up I just do so when I'm going to use them, as I do with plain sesame seeds.
If you enjoyed this article, please consider supporting this site by becoming my patron via Patreon.