
Homemade furikake no. 3: Noritama
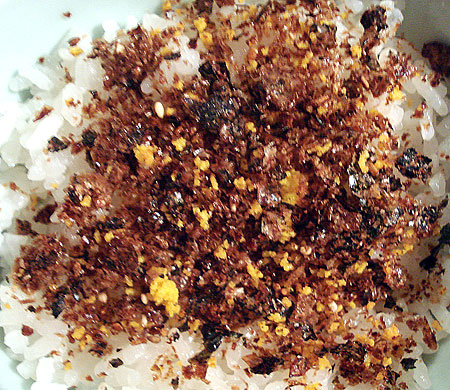
Noritama is one of the most popular flavors of furikake available commercially. Nori means the seaweed that's used as a sushi roll or onigiri wrapper, and tama is short for tamago, or egg. The base, which gives the most flavor to the furikake, is bonito flakes or katsuobushi.
Surprisingly perhaps, noritama is one of the more fiddly furikake to make at home, though it's by no means difficult. But I like to make it occasionally anyway becase I find commercial noritama to be a bit too salty. This version is lower on salt, so you can pile it on your rice if you want to. Naturally it's free of any preservatives, MSG, or what have you. It's also a lot cheaper than the commercial versions, even if you have to pay premium prices for the bonito flakes and nori as I do.
Noritama (nori and egg) furikake
Makes about 2 cups.
- 1 1/2 cups of bonito flakes if you have very fine flakes; or 4 to 5 large handfuls of bonito flakes if you have large flakes
- 3 to 4 large sheets of nori
- 1 tablespoon sesame seeds
- 2 hardboiled eggs
- 3 to 4 tablespoons dark soy sauce
- 1 tablespoon mirin
- pinch of sea salt
Equipment needed:
- a large bowl
- oven
- non-stick baking sheet or baking sheet with lining paper
- non-stick frying pan
- sieve or mesh tea strainer
- food processor (optional)
Preheat the oven to 300°F / 150°C.
Crumple up the bonito flakes if they are large, into the bowl. Crumple up the nori sheets into the bowl. Make sure your hands are dry or the flakes will stick all over them. Mix well with the soy sauce and mirin.
On a non-stick baking sheet, or a baking sheet lined with kitchen parchment paper or non-stick pad, spread the mixture out thinly. Put in the oven and let 'bake' (you're really drying it out) for 10-15 minutes. Watch and smell - if it starts to smell in the least bit like burned soy sauce, take it out.
In the meantime, take out the yolks of the hardboiled eggs - use the whites for a salad or something. Pass the yolks through a fine-meshed sieve, or a tea strainer if you don't have a sieve, directly into the non-stick frying pan. You want fine grains of yolk.
Put the pan over a low heat with a pinch of sea salt, and let the yolks dry out slowly. After a few minutes, gently toss the pan to loosen up the yolk particles. As the bits start to dry out, you'll be able to hear them making a rustling dry sound in the pan. Let them dry out like this, shaking occasionally, until the bits are quite dry. This may take 15-20 minutes. Don't let them brown. This is the fiddly part of this furikake. (The yolks are in this furikake mainly for color, so you can omit them if you don't want to bother with them, though then the furikake won't be noritama, but just nori...I guess.)
Don't forget to check on the oven in the meantime! When the bonito flake-nori mixture is done it should be quite dry. If it has moist spots, stir around a bit with a spatula and return to the oven for a few minutes.
When done, let cool. In the meantime, toast the tablespoon of sesame seeds in a dry pan until a couple of seeds 'pop'. Let this cool also.
When the bonito-nori mixture is cooled, crumble it up with your hands as fine as possible. Or, put it in a food processor and pulse-mix until it's fairly fine (but not a fine powder).
Mix in the cooled dried out egg yolk and toasted sesame seeds with the bonito-nori mixture. Store in an airtight container in the refrigerator for about a week or so (It may last longer, but in our house it rarely makes it over a few days.) Sprinkle on rice, on soup...or, as someone in our house does, just eat it by the spoonful as a snack.
If you enjoyed this article, please consider supporting this site by becoming my patron via Patreon.